If you’ve ever craved something crispy on the outside, warm and gooey on the inside, then these Homemade Cheesy Breadsticks are exactly what you need. They strike the perfect balance between soft, cheesy deliciousness and a golden, slightly crunchy crust that makes every bite irresistible. Whether you’re serving them as a snack, alongside dinner, or even for a casual get-together, this recipe transforms a simple ingredient list into a crowd-pleasing treat. Let’s dive into how you can make these at home with ease and fun!
Why You’ll Love This Recipe
- Simple ingredients: You only need a handful of common pantry items to make these irresistible breadsticks.
- Quick prep time: From start to finish, this recipe won’t keep you waiting long before you get to enjoy cheesy goodness.
- Perfectly versatile: These breadsticks are equally great for meals, snacks, or party appetizers.
- Customizable flavors: Easily tailor the cheese and seasoning to suit your tastes or dietary needs.
- Crispy and gooey contrast: The texture combination is what turns a simple breadstick into a crave-worthy delight.
Ingredients You’ll Need
Creating perfect Homemade Cheesy Breadsticks relies on simple yet purpose-driven ingredients that build flavor, texture, and vibrant color. Each element is essential to help you pull off that signature mix of crispy edges and melted cheesy center.
- All-purpose flour: Provides the sturdy base and soft crumb structure for the breadsticks.
- Active dry yeast: Ensures your dough rises beautifully, yielding a light and airy interior.
- Warm water: Activates the yeast and brings the dough together smoothly.
- Sugar: A small amount feeds the yeast and adds a balanced hint of sweetness.
- Salt: Enhances all flavors without overpowering the cheesy notes.
- Olive oil: Adds moisture and a subtle richness, plus helps create a golden crust.
- Shredded mozzarella cheese: The gooey, melty heart of these breadsticks.
- Grated Parmesan cheese: Adds sharp, nutty layers of flavor that amplify the cheese experience.
- Garlic powder: Infuses a gentle, savory kick without overwhelming the delicate breadstick flavor.
- Dried Italian herbs (optional): Bring in fragrant notes like oregano and basil for a more aromatic touch.
Variations for Homemade Cheesy Breadsticks
If you love playing with flavors in the kitchen, then this recipe is your creative playground. It adapts wonderfully whether you want to add a different cheese, skip gluten, or make it a bit more indulgent or healthy.
- Cheese swaps: Use cheddar, provolone, or gouda for unique cheesy flavors with the same great texture.
- Herb blends: Experiment with fresh rosemary, thyme, or crushed red pepper flakes for added kick and aroma.
- Gluten-free option: Substitute with a gluten-free flour mix to enjoy these breadsticks without the gluten.
- Vegan makeover: Use vegan cheese and plant-based milk for a dairy-free delight that tastes just as amazing.
- Stuffed center: Add a layer of pesto, marinara, or spinach and artichoke dip inside before baking for a flavorful surprise.

How to Make Homemade Cheesy Breadsticks
Step 1: Prepare the dough
Begin by combining warm water, sugar, and active dry yeast in a bowl. Give it 5 minutes until it’s frothy and alive. Then, mix in the flour, salt, and olive oil, kneading until smooth and elastic. Let the dough rise in a warm spot for about an hour until it doubles in size.
Step 2: Shape the breadsticks
Punch down the dough gently and roll it out into a rectangle on a floured surface. Sprinkle shredded mozzarella and grated Parmesan evenly across the dough. You can also add your garlic powder and dried herbs at this point. Carefully roll up the dough, seam side down, and slice into stick-sized pieces.
Step 3: Bake to perfection
Place the breadsticks on a parchment-lined baking sheet, allowing a bit of space between each. Brush the tops with olive oil or melted butter to encourage golden crispness. Bake in a preheated oven at 400°F (200°C) for about 15-18 minutes or until the breadsticks are golden and every bite is cheese-melty.
Step 4: Serve fresh and warm
Once out of the oven, let the breadsticks cool slightly. They’re best enjoyed fresh, dipped in your favorite marinara sauce or garlic butter. The combination of warm cheese and crunchy edges is simply unbeatable.
Pro Tips for Making Homemade Cheesy Breadsticks
- Perfect yeast activation: Make sure your water is warm, not hot, to properly activate the yeast without killing it.
- Don’t skip the rise: Allow the dough to double in size for fluffier, softer breadsticks.
- Cheese layering matters: Even distribution ensures every bite is cheesy and delicious.
- Brush before baking: Olive oil or melted butter before baking encourages a beautiful crust.
- Use parchment paper: Prevents sticking and cleans up your baking sheet effortlessly.
- Keep them warm: If not eating immediately, warm briefly before serving for that just-baked taste.
How to Serve Homemade Cheesy Breadsticks
Garnishes
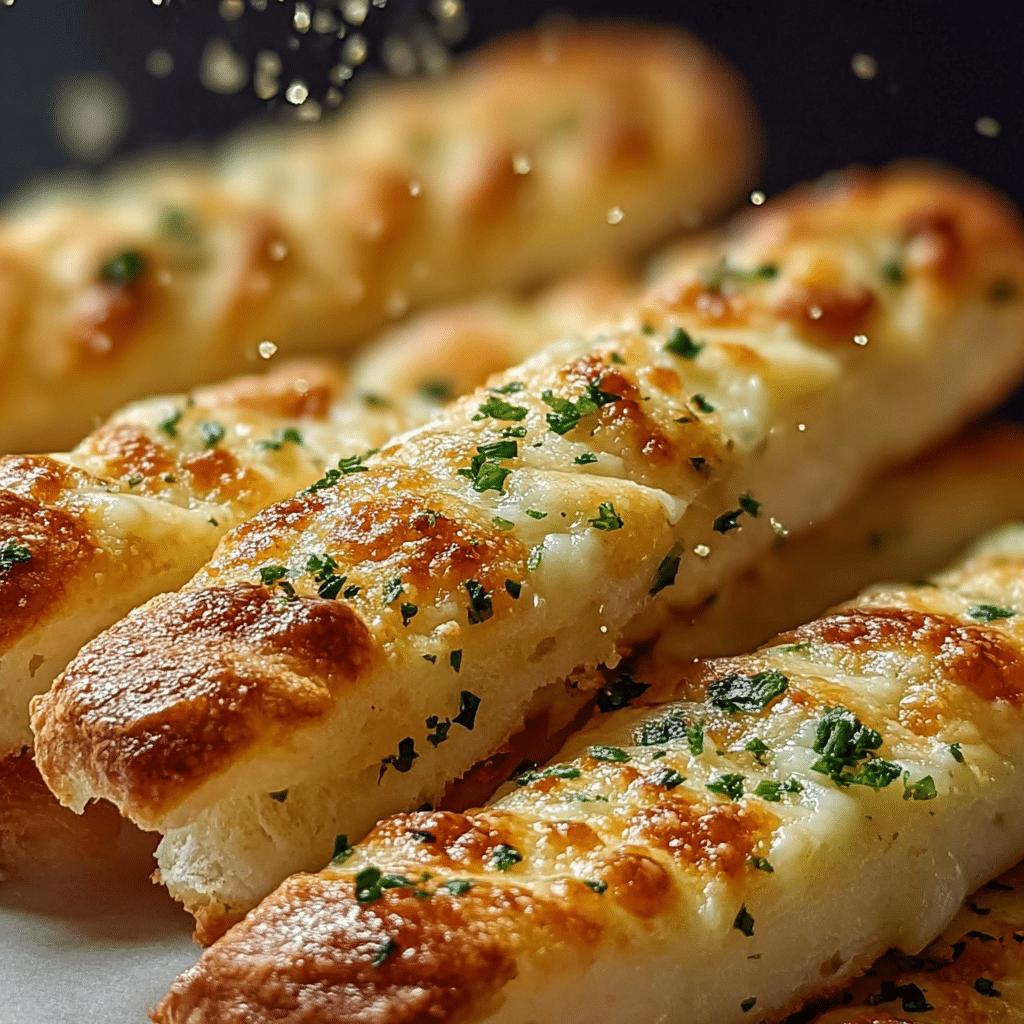
Enhance your breadsticks with a sprinkle of fresh chopped parsley, a dusting of grated Parmesan, or a dash of red pepper flakes. These garnishes add a pop of color and flavor, making them visually appealing and tastefully exciting.
Side Dishes
Pair your breadsticks with a zesty marinara sauce for dipping, a fresh Caesar or garden salad, or alongside a hearty soup like tomato basil or minestrone to round out a cozy meal.
Creative Ways to Present
Serve your Homemade Cheesy Breadsticks in a rustic bread basket lined with a colorful napkin, or stack them neatly on a platter garnished with herbs for a party-ready presentation. You can also pair them with a trio of dipping sauces for guests to enjoy variety.
Make Ahead and Storage
Storing Leftovers
Place leftover breadsticks in an airtight container or wrap them tightly in foil to keep them fresh. They’ll stay soft and flavorful for up to 2 days at room temperature.
Freezing
Wrap individual breadsticks tightly in plastic wrap and store them in a freezer-safe bag for up to 3 months. Freeze before baking or after cooling them post-bake for best results.
Reheating
Reheat frozen or refrigerated breadsticks in a preheated oven at 350°F (175°C) for 5-7 minutes. This method preserves the crispy exterior and melty cheese inside better than microwaving, which can make them soggy.
FAQs
Can I use store-bought pizza dough for this recipe?
Absolutely! Store-bought dough works great and cuts down prep time without sacrificing flavor or texture.
What type of cheese is best for the breadsticks?
Mozzarella is a classic choice due to its melty texture, but combining it with Parmesan adds a lovely sharpness and depth.
Are these breadsticks good for meal prep?
Yes! They store well and reheat nicely, making them perfect for prepping ahead for busy days or packed lunches.
Can I make this recipe dairy-free?
Definitely. Substitute dairy cheeses for plant-based alternatives and use olive oil instead of butter to keep it vegan and lactose-free.
How do I prevent the breadsticks from becoming soggy?
Be sure to bake them until golden and brush with oil or butter before baking. Also, avoid covering them tightly while still warm to maintain crispness.
Final Thoughts
These Homemade Cheesy Breadsticks are a sure-fire crowd-pleaser that always bring smiles to the table. Easy to make and endlessly adaptable, they truly feel like a warm hug from your oven. So, grab your ingredients, roll up your sleeves, and get ready to enjoy cheesy, crispy bliss at any time of day. You’re going to love how effortlessly delicious and comforting they turn out!