Easter is the perfect time to celebrate with sweet treats, and what better way to impress your guests than with a whimsical Easter Bunny Cake? This fun, festive cake is sure to become the star of your holiday table. Designed to resemble an adorable bunny face, this cake combines delicious layers of soft cake, creamy frosting, and sweet decorations that will make everyone smile. Whether you’re hosting an Easter brunch or bringing a dessert to a family gathering, this Easter Bunny Cake is both charming and delicious. Not only is it a showstopper, but it’s also surprisingly easy to make with simple ingredients and a little creativity. So, roll up your sleeves, and let’s dive into this fun and festive baking project.
Why You’ll Love This Recipe
1. Perfect for Easter Celebrations
The Easter Bunny Cake is a festive and fun dessert that perfectly captures the spirit of the holiday, making it an ideal centerpiece for your Easter table.
2. Adorable Design
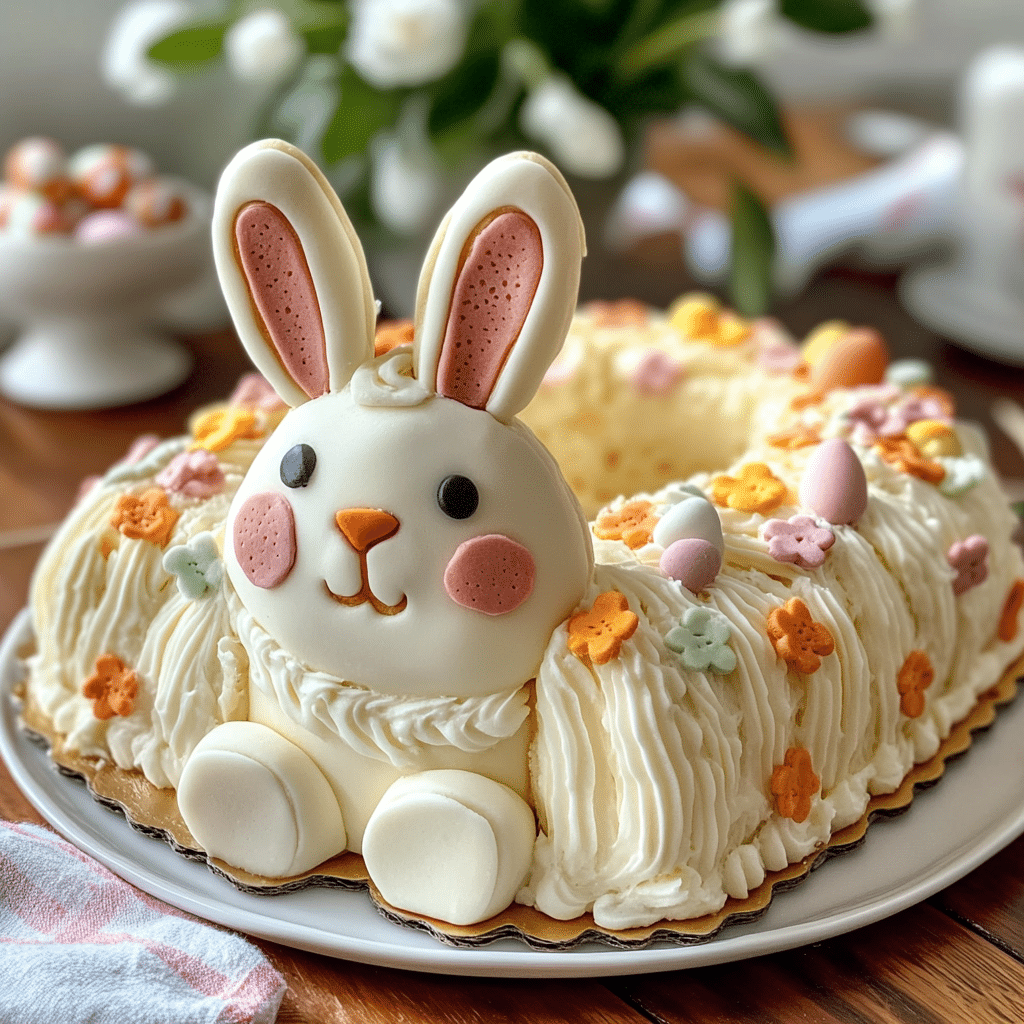
With its cute bunny face and pastel-colored decorations, this cake is a delightful treat that will charm both kids and adults alike.
3. Delicious and Moist
The cake itself is soft, moist, and flavorful, with a creamy frosting that complements the light texture of the cake. It’s a treat for the taste buds and the eyes.
4. Customizable
You can easily adjust the design to fit your style, adding extra touches like candy eyes, edible flowers, or even creating different bunny expressions. Make it your own!
5. Great for Group Gatherings
This cake is big enough to serve a crowd, making it perfect for family gatherings, parties, or Easter brunches.

Ingredients
- 2 9-inch round cakes (any flavor you prefer, such as vanilla or carrot)
- Butter (softened)
- Powdered sugar
- Heavy cream or milk
- Vanilla extract
- Pink food coloring
- Coconut flakes (for the bunny’s fur)
- Jelly beans or candy for the bunny’s nose and eyes
- Chocolate chips (for the bunny’s mouth and whiskers)
- Pink, white, and black icing (for decorating)
- Fresh flowers (optional for decoration)
Variations
- Cake Flavors: Feel free to get creative with your cake flavors! You can use vanilla, chocolate, or even carrot cake for a unique twist.
- Frosting Options: Swap out traditional buttercream frosting for cream cheese frosting or whipped cream for a lighter texture.
- Decorations: Add other candy, such as licorice for the bunny’s whiskers or mini marshmallows for the bunny’s ears.
How to Make the Recipe
Step 1: Prepare the Cakes
Bake the cakes according to the recipe instructions for your chosen cake flavor. Once baked, let the cakes cool completely before assembling the cake.
Step 2: Cut the Cakes
To create the bunny shape, place one cake on a serving plate as the bunny’s face. Cut the second cake in half to create two bunny ears. Position the ears above the face.
Step 3: Frost the Cake
Using a butter knife or offset spatula, spread a thin layer of frosting over the entire cake, including the ears. Make sure to smooth it out evenly for a neat appearance.
Step 4: Add the Bunny’s Features
Use pink food coloring to tint some of the frosting for the bunny’s nose and inner ears. Apply it to the appropriate areas using a piping bag or a spoon. Then, add coconut flakes around the edges to give the bunny a fluffy fur effect. Use chocolate chips or black icing to create the mouth and whiskers.
Step 5: Decorate the Bunny’s Eyes and Nose
Place two jelly beans (or candy of your choice) for the bunny’s eyes and a pink jelly bean or candy for the nose. You can also pipe little dots of frosting for added detail.
Step 6: Final Touches
If desired, add a few pastel-colored flowers or candy decorations around the bunny for a cheerful, spring-like finish. Allow the cake to set for a few minutes to ensure the decorations stay in place.
Step 7: Serve and Enjoy
Once the cake is fully decorated, serve it up and watch everyone’s faces light up. This cake is sure to bring both smiles and compliments!
Tips for Making the Recipe
- Use a Serrated Knife: When cutting the cake, use a serrated knife to ensure smooth, even cuts for the bunny’s face and ears.
- Chill the Cake Before Decorating: If the cake is too soft or the frosting is too warm, it can be tricky to decorate. Chill the cake in the fridge for 30 minutes before frosting to help everything set better.
- Use Gel Food Coloring: For more vibrant, intense colors, use gel food coloring rather than liquid food coloring. It gives a stronger, more consistent color to your frosting.
- Make Ahead: You can bake the cakes ahead of time, allowing them to cool completely before wrapping them tightly in plastic wrap and storing them in the fridge for up to 2 days.

How to Serve
This Easter Bunny Cake is best served at room temperature to enjoy its soft and moist texture. It’s perfect for an Easter brunch, afternoon tea, or family gathering. Pair it with fresh fruit, coffee, or tea for a complete dessert spread. If you’re serving a crowd, slice it into generous portions to make sure everyone gets a piece of this sweet, festive treat.
Make Ahead and Storage
Storing Leftovers
Store any leftover cake in an airtight container at room temperature for up to 3 days. If the cake is decorated with delicate decorations, you can store it in the fridge to prevent the frosting from melting.
Freezing
To freeze, wrap the cake in plastic wrap and foil before placing it in the freezer. It can be frozen for up to 1 month. When ready to serve, let it thaw in the fridge for a few hours before decorating.
Reheating
You don’t need to reheat this cake, as it’s best served at room temperature. If you’ve stored it in the fridge, let it sit for 15-20 minutes before serving to bring back its soft texture.
FAQs
1. Can I make this cake gluten-free?
Yes, you can use gluten-free cake mix or flour to make this cake gluten-free, making it suitable for those with gluten sensitivities.
2. How can I make this cake dairy-free?
To make this cake dairy-free, substitute dairy-free butter, milk, and non-dairy frosting. There are many vegan options available at most grocery stores.
3. Can I use a cake mix instead of baking from scratch?
Absolutely! If you’re short on time, a store-bought cake mix will work perfectly for this recipe.
4. How do I make the bunny ears stand up?
Ensure the ears are cut evenly and placed securely on the cake with frosting. If needed, use toothpicks to support the ears until the frosting hardens.
5. Can I decorate this cake in advance?
Yes, you can decorate the cake a day ahead of time. Just store it in the fridge, but be sure to allow it to come to room temperature before serving.
6. What if I don’t have coconut flakes?
If you don’t have coconut flakes, you can use shredded white chocolate or even marshmallow fluff to mimic the bunny’s fluffy fur.
7. Can I use fondant for the decorations?
Yes, fondant can be used to create the bunny’s features, such as the ears, nose, and eyes, for a smooth and polished finish.
8. Can I use a different design instead of a bunny face?
Feel free to get creative! You can turn the cake into an Easter chick, a flower, or any spring-themed shape.
9. Can I make this cake without food coloring?
Yes, you can make the cake without food coloring if you prefer a more natural look or want to keep the decorations simple.
10. Can I add more decorations to the cake?
Absolutely! You can add edible glitter, sprinkles, or even chocolate bunnies to make it even more festive.

Conclusion
This Easter Bunny Cake is a fun, festive, and delicious way to celebrate the holiday. With its adorable design, delightful flavor, and easy-to-follow steps, it’s the perfect dessert to bring joy to your Easter table. Whether you’re hosting a family gathering or just want to add a touch of whimsy to your celebration, this cake will surely be the highlight of the day. Get ready to hop into the kitchen and create a treat everyone will love!
Print
Easter Bunny Cake
- Total Time: 2 hours (including cooling and decorating)
- Yield: 12–16 servings 1x
- Diet: Vegetarian
Description
This adorable Easter Bunny Cake is the perfect centerpiece for your holiday celebrations. A moist, fluffy cake shaped like a bunny, decorated with colorful frosting, coconut fur, and candy accents. This whimsical cake is sure to delight both kids and adults alike, making it a fun and festive treat for Easter gatherings or spring parties!
Ingredients
For the Cake:
- 2 boxes of white or vanilla cake mix (or your favorite homemade cake recipe)
- Ingredients needed for cake mix (usually eggs, oil, and water)
- 1 teaspoon vanilla extract (optional, for extra flavor)
For the Frosting:
- 4 cups powdered sugar
- 1 cup unsalted butter, softened
- 2 teaspoons vanilla extract
- 3–4 tablespoons heavy cream or milk (adjust for desired consistency)
- 1–2 drops of pink food coloring (optional, for bunny ears and nose)
- 1–2 drops of black food coloring (optional, for the eyes and whiskers)
For the Decoration:
- 1 cup shredded coconut (for the bunny fur)
- Pink jelly beans or candy for the bunny nose and eyes
- Licorice or string candy (for the whiskers)
- Mini marshmallows (optional, for the bunny’s tail)
Instructions
-
Prepare the Cake: Preheat your oven to 350°F (175°C). Grease and flour two round cake pans and one heart-shaped cake pan (for the bunny ears). Prepare the cake batter according to the instructions on the cake mix boxes (or your homemade cake recipe) and add the vanilla extract for extra flavor.
-
Bake the Cake: Pour the batter into the round cake pans and the heart-shaped pan. Bake according to the package instructions or until a toothpick inserted into the center of the cakes comes out clean. Let the cakes cool completely on a wire rack.
-
Make the Frosting: While the cakes cool, prepare the frosting. In a large bowl, beat together the softened butter and powdered sugar until smooth. Add the vanilla extract and gradually add heavy cream or milk to reach a smooth, spreadable consistency.
-
Assemble the Bunny Cake: Once the cakes have cooled, carefully remove them from the pans. Place one round cake on a serving platter to form the bunny’s head. Cut the second round cake in half and place the two halves at the top of the first cake to form the bunny’s ears. Use the heart-shaped cake to make the inner part of the ears, positioning it upside down to create the ear shape.
-
Frost the Cake: Frost the entire bunny cake with the white buttercream frosting, making sure to cover the ears and head evenly.
-
Add the Coconut Fur: Once the cake is frosted, gently press the shredded coconut onto the surface of the cake to create the “fur” effect. You can use your fingers to lightly press the coconut onto the frosting to ensure it sticks.
-
Decorate the Bunny’s Face: Use pink jelly beans for the nose and eyes. You can use black food coloring to pipe on whiskers and other facial features. For the ears, add a little bit of pink frosting inside the ears to create the inner ear detail. You can also add mini marshmallows as a fluffy tail at the back of the bunny.
-
Serve and Enjoy: Once decorated, your Easter Bunny Cake is ready to be served! Enjoy with friends and family as a fun holiday dessert.
Notes
- If you want a more decadent version, you can add a layer of frosting or jam between the cake layers for extra flavor.
- Feel free to customize the decoration with different candies or edible flowers for an extra touch of Easter charm.
- For a slightly healthier version, you can use coconut yogurt instead of frosting and top with naturally dyed coconut or fruit.
- Prep Time: 20 minutes
- Cook Time: 30-35 minutes
- Category: Dessert
- Method: Baking
- Cuisine: American
Keywords: Easter cake, bunny cake, holiday dessert, spring cake, decorated cake, Easter treat, fun cake for kids